7 TIPS WHEN HOSTING AN OPEN GARDEN EVENT
One of the highlights in the summertime for all garden lovers is to visit the neighbour’s gardens or host an open garden event!
When you open your garden to visitors, one of the most common questions you get is: “What is the name of that plant?”. And when this happens, it is good to be prepared and have lists and notes or why not Gardenize garden app at hand, to help guide your guests.
It can be difficult to have time to be everywhere at once and to talk to all the lovely visitors. Here is a list of seven tips on how to easily inform your visitors about everything in your garden!

CHECKLIST: WHEN YOU HOST AN OPEN GARDEN EVENT
If you already have entered your plants in Gardenize, you can simply tell your visitors to follow you in the app, and they will find all your garden information. To make it a true success, follow these steps:
1. PIMP YOUR PROFILE
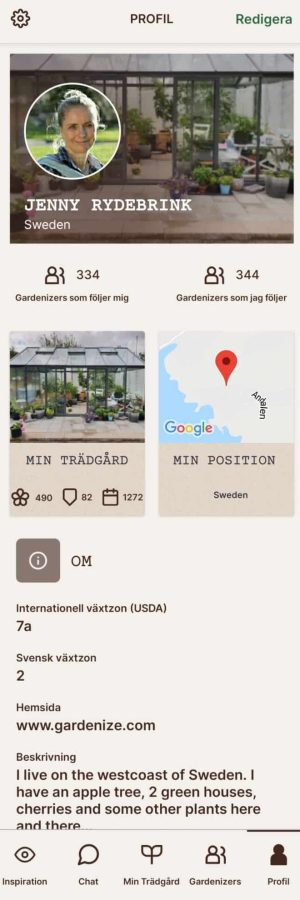
For starters, we recommend that you pimp the profile page in Gardenize. You find the profile page to the right in the bottom navigation bar in the app.
- Pick beautiful and descriptive photos of your garden and as your profile picture.
- Write a description of your garden, and add a note about the event you are hosting. If you include the event name in the description, it will pop up in the search result when people look for Gardenizers to follow.
- Add your e-mail address, phone number and your address.
- Mark the location of you garden on the map.
- Make your garden public in the settings. This way, you don’t have to approve all Gardeners who wants to follow your account.
Profile Descripttion

2. INFORM YOUR VISITORS ABOUT YOUR OPEN GARDEN
Make sure as many people as possible find your garden, both in in real life, and at Gardenize. Share the event on different social media channels. Include the address and a note about how to download Gardenize, and the name of your Gardenize account.
You can even create a QR code, that will guide visitors directly to your Gardenize account. If you want this please contact Jenny at jenny.rydebrink@gardenize.se and she will help you!
Please feel free to try this code and you will see how it works.

QR-kod to Jennys garden, please try it!
3. ARRANGE YOUR PLANTS
Make your plant list in Gardenize beautiful and easy to navigate in. Here are a few tips to guide you:
- Make sure each plant has the proper name including scientific name. If you know the variety, add that too.
- Add several photos of each plant, it will make identification easier. You can set the prettiest picture as the preview by choosing your favourite photo. This, by clicking the little heart on the photo when you are in edit mode.
- If you have plants in your list, that are not in your garden anymore, one trick is to put a Z in front of the plant name. This way these plants will be moved to the end of the list, as the list is sorted alphabetically.
4. STYLE YOUR GARDEN AREAS
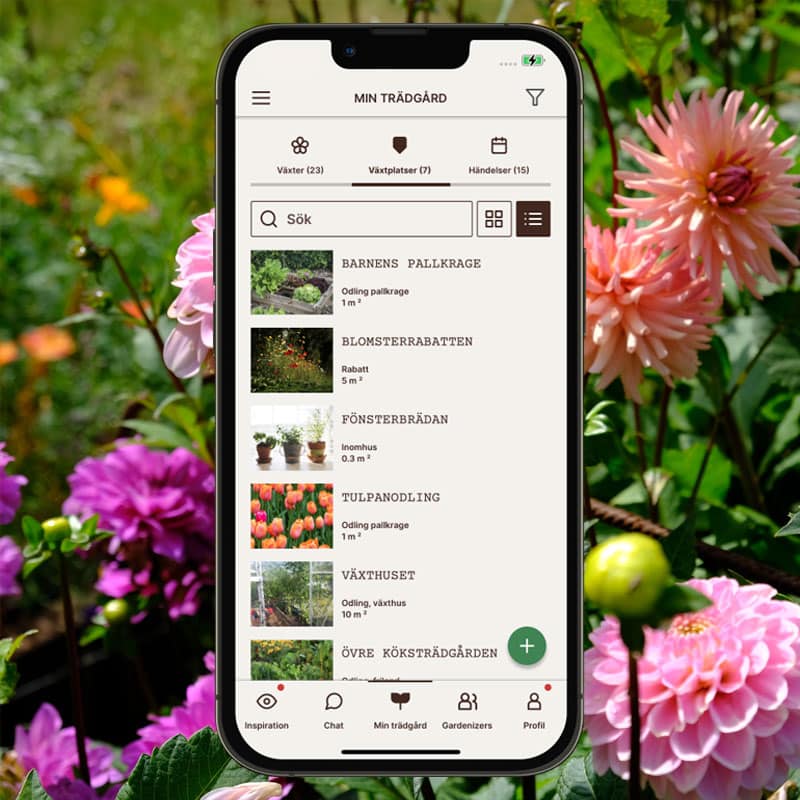
When hosting an event in your garden, it is important to have the garden areas in Gardenize well. By giving each area a descriptive and intuitive name, you simplify the garden tour for your guests.
Here are more ideas:
- Name the areas in ways that make sense for visitors.
- Add little signs at each bed, and it will be even more simple.
- Double check that all areas are in the app, and that plant list is up to date.
- Add several photos of each area, to help visitors visualise the changes of the season in your garden.
- Use the notes field to explain your idea with each area. Maybe it is still work in progress? Or you might have arranged the plants with a special vision in mind?

5. PRINT A PLANT LIST
Not all visitors are comfortable to use mobile applications, hence an alternative is to export your plant list to excel and print it on paper.
With Gardenize export function (you find it in the left side menu) you have the option to export all your plant to a spread sheet. In a few minutes, you will get a link to your e-mail address, and when you open it you can open it in Excel or Google sheets.
The spread sheet is divided in the different sheets, one for plants, one for areas and one for events. You can off course modify the document as you wish.
6. AN EASY WAY TO DO UPDATES
The easiest way to update your Gardenize-account is to do it via computer. And to access your account, you need to have a Plus subscription.
With Gardenize plus you can:
- Use Gardenize on a computer to make editing and notes.
- Add many photos to each plant, area and event
- Set favourite photo, so the account always looks nice.
- Export the plant list, and make a print out
7. WHAT HAPPENS NEXT? KEEP IN TOUCH WITH GARDENIZE!
A great reason to use Gardenize when you have visitors in your garden, is that it makes it so much easier to keep in touch afterwards.
When the visitors starts to follow your account, you can see it in the notification center of the app (you find it in the menu to the left). By connecting back to the other Gardenizers, you can view their garden progress, start chatting with them and have follow up conversations. Maybe they have some additional questions or, you might want to visit their gardens …
WHEN YOU PLAN TO VISIT OTHER GARDENS
If you plan to visit someone else’s open garden event, take the opportunity to ask if they use Gardenize, and if yes, ask to follow them, and if not, recommend them to start using it.
If you don’t have Gardenize yet, you can download it from App store or Google play.
Create an account, click on “Gardenizers” in the bottom navigation bar, and then the + sign, to make a search.
Depending on other users settings, you might need to ask permission to follow the particular garden, and wait for your request to be approved.
QR Code

You can also scan this QR code, and you will be navigated directly to the page where you can visit other Gardnizers.
